Outdoor garbage cans work on the frontlines of waste management, bearing the brunt of household trash, which can result in inevitable residue buildup and unpleasant odors, which is why keeping them clean is essential to maintaining a hygienic living space.
By integrating the cleaning of your garbage cans and bins into your maintenance schedule, you can ensure that your cans are in optimal condition, contributing to a healthier environment and allowing you to transform a grimy trash can into a spotless container.
In this guide, we will go through how to clean your garbage cans and bins to achieve a pristine, clean home. So let’s get into it!
The Key Takeaways
- Regularly cleaning your outdoor garbage cans improves your home hygiene.
- A systematic approach to cleaning your garbage cans can simplify the cleaning process.
- Preventive practices aid in maintaining the long-term cleanliness of your home.
The 6 Main Steps to Clean Your Outdoor Garbage Cans
Having a systematic approach to the way you clean your outdoor garbage cans can have a huge impact on your maintenance routine, making this task more effective. So let’s take a look at the steps you need to take in order to get pristine outdoor garbage cans.
1) Prepare to Clean
Preparing to clean outdoor garbage cans involves a few essential steps to ensure the process is both effective and safe. So let’s take a look at a few considerations to keep in mind when it comes to preparing.
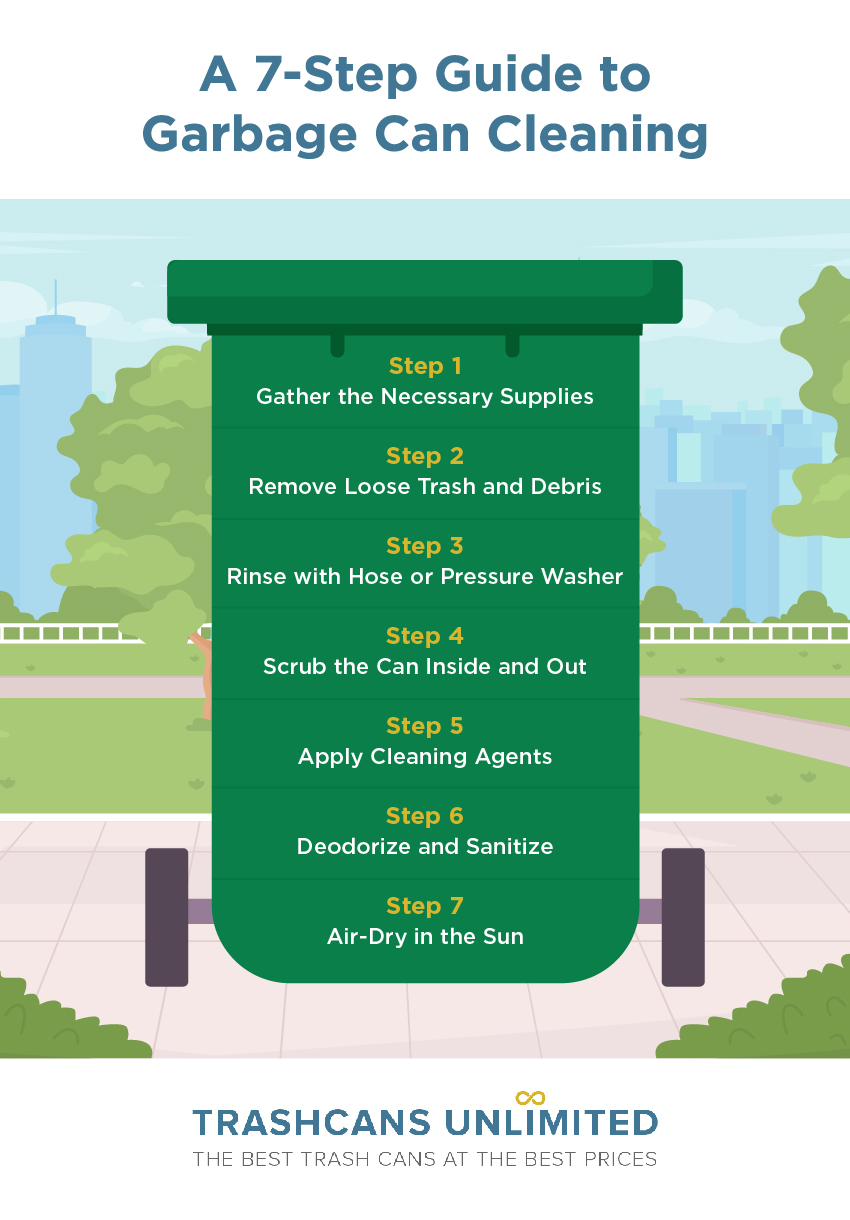
- Gather rubber gloves, a bucket, a garden hose, a cleaning solution, and a scrub brush, which are all of the necessary supplies that you will need to clean your garbage cans.
- Put on the rubber gloves to shield your hands from the contaminants and the cleaning solution, as they can be hard on your skin.
- Make sure that you have a well-ventilated area to clean your garbage cans so you can avoid inhaling the fumes from the solution.
- Secure the area by placing the garbage can on a flat surface to prevent it from tipping over.
Once you have gathered your materials and your area is ready for your task, it’s time to remove any debris and start the process. Let’s take a look at how to do this successfully.
2) Prep the Garbage Can
To begin cleaning your garbage can, you must first remove loose trash, which will help you prepare the cans for disinfection. This is key to ensuring that the upcoming rinse water can reach all the interior surfaces without impediments.
After the trash and debris have been removed, use a hose or a pressure washer to rinse your cans. If you can, use a strong stream of water to dislodge and flush out any remaining debris and direct the water to all corners of the bin, where waste tends to accumulate.
If you have water pressure, you will be able to remove the debris more effectively, so consider getting one if you don’t. Once this is done, you will be ready to start cleaning your garbage cans.
3) Deeply Clean
Deep cleaning of outdoor garbage cans is essential to eliminating germs and foul odors. Just remember to put on your protective gloves before getting started to protect your skin from contaminants.
Now get your cleaning solution ready in your bucket and use a scrub brush to firmly scrub the interior surfaces of the can with hot, soapy water both on the inside and the outside of the garbage can.
After the garbage can is scrubbed, apply a cleaning solution that will help remove the remaining dirt and stains. And if you come across any tough stains, let the solution sit for a few minutes before scrubbing again.
4) Deodorize and Sanitize
Once your garbage can is clean, deodorize and sanitize the can by sprinkling baking soda on the bottom of the can to absorb odors. You can also apply white distilled vinegar to serve as a natural disinfectant.
5) Dry Your Garbage Can
After deodorizing and sanitizing your garbage can, it’s important to properly dry your cans to keep them bacteria- and odor-free. To achieve this, place them in a sunny spot to air-dry completely after cleaning.
The sun serves as a natural sanitizer, helping to eliminate any residual bacteria or mold. If the sun is at an angle, try to place the can as directly as possible in order to allow all of the water to dry.
6) Prevent Build-Up
Once dry, you may also want to adopt some preventive measures to make this task more manageable. So let’s take a look at some tips you can apply to keep your cans clean longer and reduce the task of maintenance.
- Place a sturdy liner at the bottom of the can to make future cleanings easier.
- Rinse the bins with a garden hose between deep cleanings to prevent buildup.
- Place a tarp under the bin to catch any leaks and make the surrounding area easier to clean.
This regular attention prevents decay and long-term damage, extending the lifespan of these essential household items and making your maintenance schedule easier to keep up with. And if you don’t have a regular cleaning schedule yet, let’s take a look at our suggestion.

The Ultimate Cleaning Schedule
We recommend that you establish a routine cleaning schedule to keep your outdoor garbage cans clean and prevent the buildup of grime and unpleasant odors. For an effective clean, simply follow these steps at least once a week:
- Empty the garbage can completely, making sure that no trash is left at the bottom.
- Apply a mixture of hot water and dish liquid to the inside and outside surfaces.
- Rinse the can and its lid with a hose or bucket of clean water.
- Finally, dry the garbage can and lid to prevent mildew buildup and unpleasant odors.
- Check the lid to ensure that it fits snugly and isn't cracked to ensure odors don’t get out.
- Look for any wet spots or dripping that may indicate a leak, and address any issues promptly to make cleaning easier.
By sticking to this regular cleaning schedule and inspecting the can for damage, you will be sure to have a sanitary and durable waste containment, keeping your home a healthy living environment.
Seal the Deal on Cleanliness
Maintaining clean and odor-free outdoor garbage cans is not only a matter of hygiene but also an essential aspect of creating a pleasant living environment. By incorporating the discussed cleaning strategies, you can ensure that your bins stay fresh and free from pests.
For a comprehensive selection of durable and functional trash cans to meet your waste management needs, explore the wide range of options available at Trash Cans Unlimited and elevate your outdoor spaces with top-quality garbage cans.
Just visit Trash Cans Unlimited today and choose the perfect trash can solution for your home and get ready to have a cleaner space!

